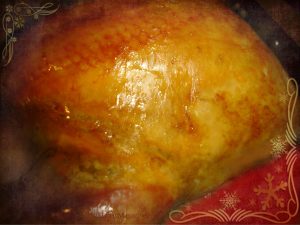
Roasting your first turkey? Don’t be intimidated!
We have some great tips to help you avoid rookie mistakes, and a step-by-step guide to help you below.
Because we have gotten used to how quickly we can thaw food in the microwave (and since most of us don’t have microwave ovens large enough for a typical turkey) not allowing enough time to thaw it is a typical rookie mistake. You need 24 hours per 5 pounds of turkey to safely thaw the bird in the refrigerator, so a 25 pound turkey will take 5 days to thaw. There is also a shorter method where you change the water every half hour (allowing 30 minutes for each pound of turkey), but we’re guessing you have better things to do in the hours leading up to the meal than mess with a heavy, slippery, ice cold turkey every 30 minutes, so our choice is the refrigerator method whenever possible.
Another rookie mistake is to forget to remove the bag of gizzards from inside the body cavities. Be sure to remove them so you don’t have melted plastic inside!
A strong roasting pan is a must, and turkey lifters are great once the turkey is piping hot. (They can be found in most utensil sections and look a little bit like goal posts.) Using an oven bag speeds roasting time and helps keep the turkey moist. (Most oven bags come with simple to follow directions so even first-timers can make a great turkey! Read the instructions first, and if the bag’s instructions vary from ours, go with the ones that are specific to the bag you purchased.)
Use your bag’s chart to determine roasting time and determine what time the turkey needs to be in the oven to be ready when you plan to eat. Be sure to allow extra time (about 30 minutes) for the meat to rest so juices will redistribute, and for carving if that won’t be done at the table. An unstuffed turkey roasts more quickly than a stuffed one, and many food scientists feel that it is safer to cook dressing in a dish outside the turkey.
If you prefer not to mess with a turkey (or if you’re reading this Thanksgiving morning beside the turkey you just took out of the freezer) never fear, you can have a delicious holiday dinner with tempting roasted chicken.
Simple Steps to Roast a Turkey
1) If buying a large frozen turkey, purchase it about a week ahead of time to allow enough time to safely thaw. (Unfrozen turkeys are often available, but they are usually more expensive.)
2) Thaw turkey in a pan to catch juices that might leak from the bag. A jelly roll pan or cookie sheet with edges works fine.
3) Preheat the oven to 350 degrees F.
4) Remove wrapper, neck and gizzards. Check both the body cavity and neck area. (You might find that wearing disposable gloves during this process is more pleasant.) If the turkey came with plastic thermometer in the breast, leave it in. It will pop up when meat reaches the correct temperature.
5) Wash turkey inside and out. Be sure to keep from contaminating items in your kitchen with raw meat or juices since these can carry salmonella. (Wipe surfaces – NOT the turkey – with diluted bleach if exposed.)
6) Rub turkey with salt inside and out for better flavor.
7) Put 1 tablespoon of flour in oven bag, hold closed, and shake to distribute. (We have substituted cornstarch for the flour when guests are sensitive to gluten, and it has worked fine for us. Check with your bag’s manufacturer to be sure it will work for yours.)
8) Put turkey in turkey sized oven bag. It is handy to have help with this, but if you are doing this alone, you can put the bag in the roasting pan and puff it up with a little air so that it will stay open. Place your hand inside the turkey (almost as if it were a puppet) and put the turkey inside the bag using your free hand to pull the bag around it. (For obvious reasons, we wait to butter the turkey until it is inside the bag!)
At this point, many people tuck the tips of the wings under to prevent them from over-browning. If you find this too difficult, odds are, no one will complain.
9) Brush or massage the skin with butter for improved browning.
10) Close bag with special tie included with oven bag.
11) Cut six 1/2 inch slits in bag so steam will escape.
12) Place turkey in the oven, making sure that when the bag expands as it heats, it won’t touch any part of the oven such as heating elements, walls, or racks.
13) Check the chart incuded with the bag for the amount of time needed for the turkey the size you are roasting. Set the timer.
14) Throughout the baking time, check to be sure that it is roasting evenly and the bag is not touching what it shouldn’t. Adjust as needed.
15) When it is nearing the time that the turkey should be done, check to make sure it is fully cooked. The internal temperature should be 180 degrees F. (Use a meat thermometer if you have one. If the turkey has one, it should have popped up.) When you cut it, there should be no red/pink juices or meat. It’s better to be overdone than underdone. Overdone might be dry, but underdone can be unsafe.
16) Be careful when removing the turkey so that you aren’t burned by hot juices or steam escaping as you cut open the bag.
17) To keep turkey moist when waiting for delayed guests or when storing leftovers, place slices in cooked turkey juices or gravy.